Saturday, 16 February 2013
Audience Feedback
Here I have asked my audience what they thought about my finished media products, I then put their narration to examples of what they mentioned to help me to identify what they did and didn't like.
Tuesday, 12 February 2013
Evidence of Editing 2
After editing my footage in Adobe After Effects, I started to edit it more in Adobe Premiere. In this programme I had my footage on a time line and I was cutting the footage and selecting clips, and then arranging them into an appropriate order.
 |
| This shows the beginning of the editing stage as the footage has not been cut. |
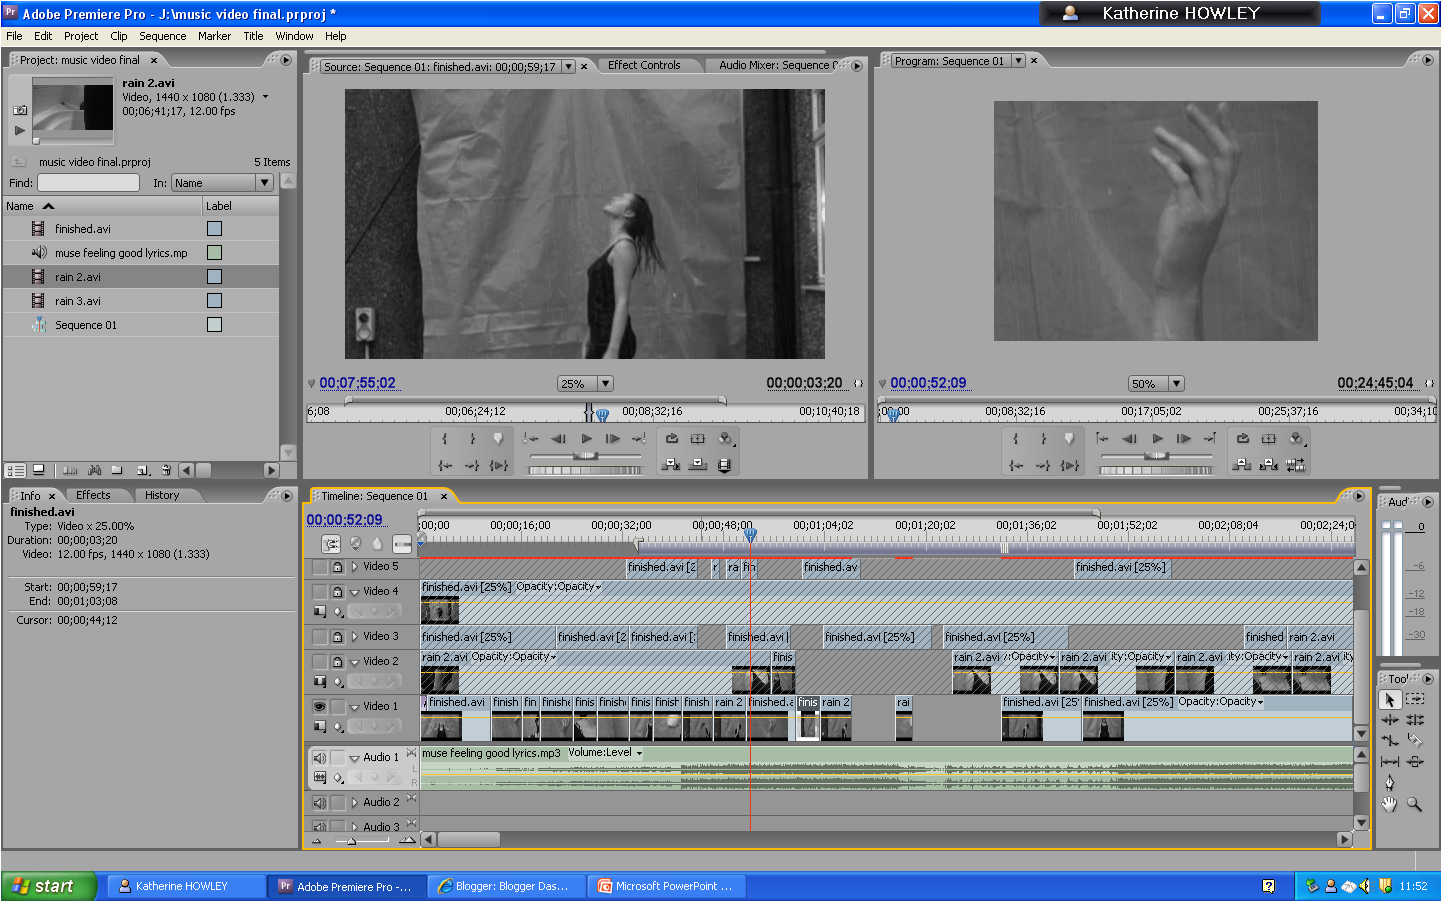 |
| This shows how the video is being edited, with the many different videos, which is where I would find and select what footage to use. |
Saturday, 2 February 2013
Evidence of Editing
As I have filmed my video I have just been working on the post production side of the video therefore here are a few screen shots of my footage being edited in Adobe After Effects, before I go and edit it in.
 |
| Here I have added in the rain effect and am know positioning it. |
 |
| This image shows how I am manipulating the time in the footage, as this is how I made it slow motion and made it so that the footage would play in reverse. |
 |
| In this Screen shot I am editing the colours of my footage. I have changed it to black and white and at the left of the screen I am changing the levels and intensity of the colours. |
Thursday, 24 January 2013
Editing Software
After
filming my music video I am now in the post production stage, therefore with
the footage that I have I need to edit it in order to make the finished video.
Firstly as I want my video to be in black and white with slow motion and
reverse effects on it, I need to use the Programme Adobe After Effects. This
programme is easy to use and if I need any help then there are many tutorial
videos on YouTube. After affects will enable me to create the music video I
vision as I can use this programme to enhanced my video. After using
After affects I will further edit my video in Adobe Premiere.

The affects that I used in after affects included making a rain effect, this I had to learn to do by watching YouTube tutorials. The way I found to create the rain was to use the dissolve tool and play around with it in order to get the correct consistency and length of rain. I then had to change the colour of my footage to black and white, but to make sure that it wasn’t too dark or too light I changed the levels and brightness.
Furthermore I used After Affects to manipulate the time of the video, this included making the video slow motion and playing the video in reverse. This too I learnt from YouTube Tutorials. It was easy to manipulate the time I just had to left click on the footage click on time and then change it from there.
Then to edit my photos and to create my magazine advert and digipak I used PhotoShop. I used this to edit the photos such as turning them into black and white, manipulating the levels and brightness and making the images symmetrical. I also used it to add in text such as the album title and album information.
A ll of the Programmes that I used were easy once I had learnt what I needed to do.

The affects that I used in after affects included making a rain effect, this I had to learn to do by watching YouTube tutorials. The way I found to create the rain was to use the dissolve tool and play around with it in order to get the correct consistency and length of rain. I then had to change the colour of my footage to black and white, but to make sure that it wasn’t too dark or too light I changed the levels and brightness.
Furthermore I used After Affects to manipulate the time of the video, this included making the video slow motion and playing the video in reverse. This too I learnt from YouTube Tutorials. It was easy to manipulate the time I just had to left click on the footage click on time and then change it from there.
Once I had
edited my footage I started to edit the music video in Premiere. I did this by
having two sets of footage, the footage in reverse and the footage in normal
order, I then picked the edits I wanted to use an cut them down. As some of the
speed of the edits were not slow enough I edited the speed by highlighting the
footage, right clicking it and editing the speed/duration, most of the footage
is at a 25% speed, where as others may vary depending on the type of clip. Then to edit the clips and shots I used the cut tool and placed the clips in the correct order.
Saturday, 19 January 2013
Raw Footage
This is most of the footage that I collected when filming. This short video includes the main parts of the footage I captured. I will edit it this to make my video, however this footage has already been shot in slow motion due to the camera I used, but I may want to slow this down even more when editing.
Wednesday, 16 January 2013
Health and Saftey
In order for the filming of my music video I had to check health and safety and therefore fill out this Risk Assessment form, so I could avoid and health and safety issues.


Actor Release Form
Before I started filming I made Sure that my actor had signed this form, as this is what happens in industry in order to avoid any difficulties or issues.


Subscribe to:
Posts (Atom)